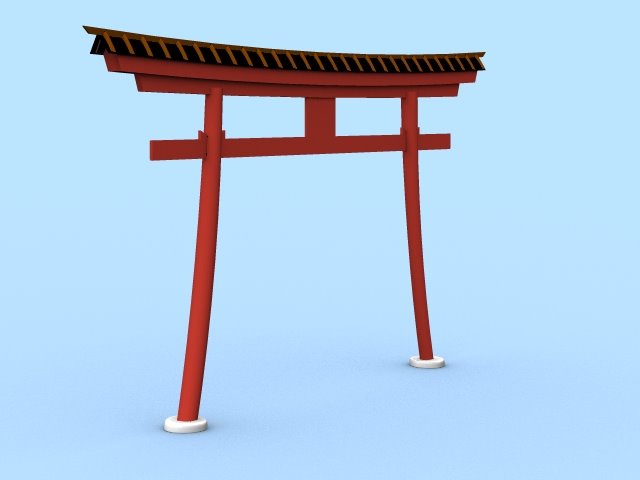
 Since I've been using stock photos instead of sketches, I don't have much in the way of concept art to blog about. However, here is the rough cut of the "tori", which is the entrance
gate to many religious sites throughout Asia. It is not unheard of for a shrine to have a number of these (usually donated by wealthy individuals), and one such arrangement appears in "Lost in Translation". The reddish-orange color is traditional, although I don't know why. It's not a requirement, but when you see a tori painted, its almost always this color. The square feature between the horizontal pieces is reserved for a plaque or inscription unique to the site.

One of the big hurdles in using AM for most people is the modeler. I'll confess that I was limited to using the supplied models for a few weeks before I caught on to how the splines worked, and the rules for what was visible and what was note when patching them together. Once you get the hang of it, you can make some very graceful models with very few control points ( I shudder to think how much work it would have taken to do this with triangular polygons in Lightwave 1.0!) You've probably already noticed that the majority of control points are taken up by the detail on the roof line. It was a case where bump maps and other shortcuts weren't going to do that job. Still, its a pretty small model considering the detail.
Next blog: splines, patches, and other AM voodoo.
kgh

5 comments:
Looks nice! Is that the default renderer? I think I can see some hints of soft shadows where the base meets the ground?
Can you post a closeup of the wireframe (splineframe?) of the detail at the top?
.trey
No, its not the default renderer. I'm using a feature caled "ambient Occlusion", which is a somewhat faster method to generate ambient light conditions, without using a lighting array, etc.
I'll add a closeup detail to the next post, since I'm not sure how you insert jpgs into comments on this site. Plus, I think I found a defect that I thought was fixed, so I'll patch it up before I present.
Dang! Trey asked what I was going to ask...
I'd like to see the visual difference between your AO render and a lighting array. Also I'd like to know about the render time differences.
So are you doing all NURBS? Mixture of NURBS/Polys? Sub-D's?
Hey! I used AO on my renders from modo, and I'll probably tweak it more for some test renders once I model a few more details on my spybot.
.trey
One of the tough points for people switching to AM from other software is the use of B-splines to model with. As Adrianne Monk would say, it's a gift and a curse. You model directly with "patches" which are the intersections of splines, so no Nurbs or polys or subDs as such. I'd have to dig into my brain to determine exactly where this method falls. (its a bonus for people entering 3D from a 2D app like Illustrator)
The plus side is that the modeler lets you do organic stuff really fast. The down side is that you lose a lot of the cool tools to model with that other programs have. Example: I can make a very smooth sphere with only 6 control points forming 3 splines in about 10 seconds. If I want to drill a hole into the sphere, then I have to jump through some hoops or use some special tools to do a boolean subtraction at render time.
The AO setting is new to this year's release of AM. Since most of the stuff I've played with in the last year is cartoon shaded, I'd have to dust off the lighting array and plug it in to see what the times are. Lighting arrays chew up so much CPU time that AO is a big help. Even if it didn't save much time, just the fact that you can use a single light and still get soft shadows is a big help.
kgh
Post a Comment